
设施
- 主机 y7000联想者
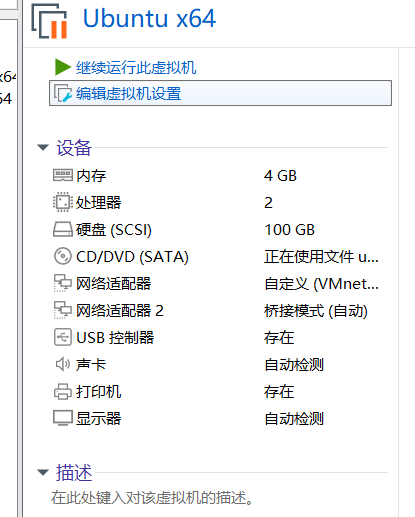
- 虚拟机 在vmvare中有ubuntu18.04 分配了100g的空间 该虚拟机的网络连接模式改为桥接模式
- tpyec转usb线(typec这条线是用来连接xavier模块和主机电脑的,这条typyec线必须接到靠近开关的typec口上)
基本步骤复盘
关键的接线
找一根合适的线usb转typec
虚拟机准备
准备好内存足够(建议直接100g)的虚拟机(我是vmvare)环境18.04ubuntu

nvidia账号
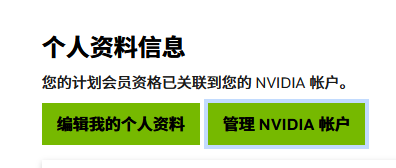
注册nvidia账号,并且修改nvidia相关年龄(我反正直接36)
原因:https://blog.csdn.net/m0_45020691/article/details/140362360
过程截图:
选右边这个,然后要再进行一次登录
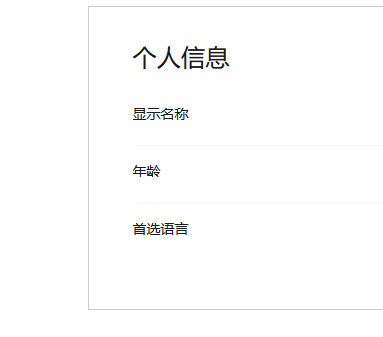
反正修改注册一顿下来就会有这些信息

sdkmanager
在虚拟机ubuntu下载sdkmanager
下载:https://developer.nvidia.com/sdk-manager
教程:https://blog.csdn.net/x_w_haohan/article/details/121404002
(我只是仿照安装这里做了sdkmanager这步骤)
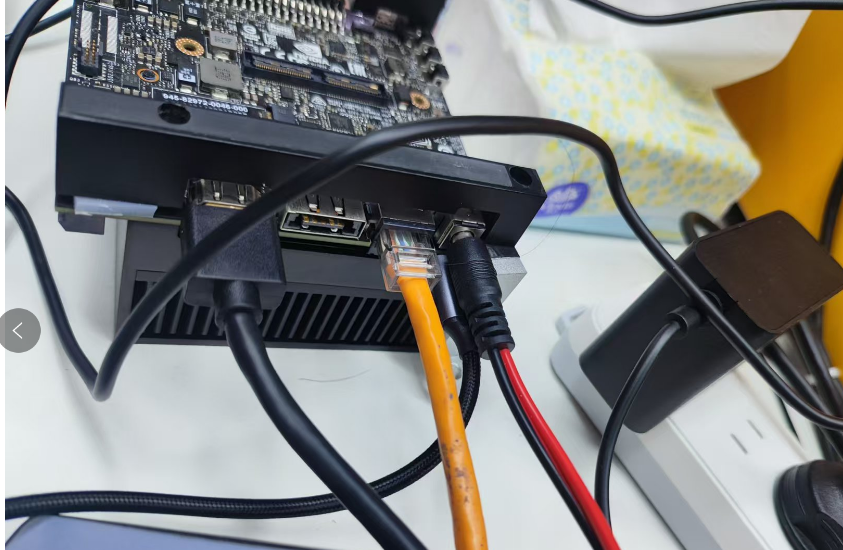
接线
(连接主机的线要接电源附近的typec口)
将设备连接到主机,其他线也接好
虚拟机自己也连接到和xavier同一个局域网下
(从左到右)HDMI显示屏线 公司网口线 电源线
下面那层在电源口下面
我找个拓展坞插鼠标和键盘
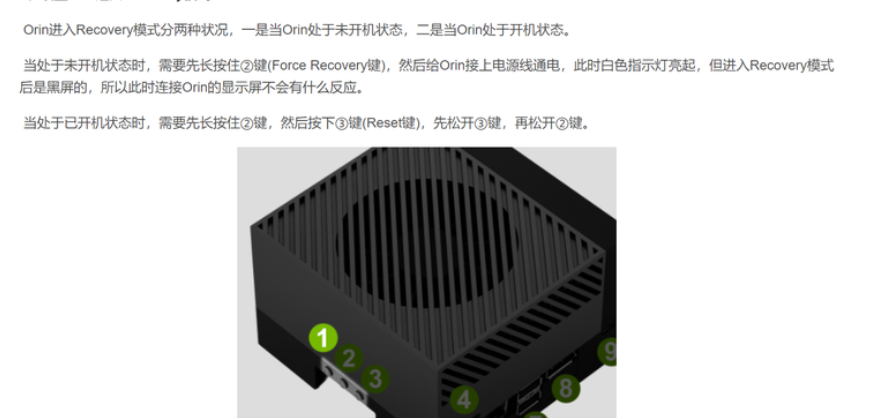
recovery模式 √
通过按键试图让机子进入recovery模式
https://bbs.huaweicloud.com/blogs/407756
烧录OS √
只烧录OS,此时最好先别一起安装和下载sdk的其他组件,就下载OS就和进行烧录就可以
正常情况的话是完成这一步之后
机子接上显示屏会自动显示ubuntu页面
安装sdk √
后续再安装sdk
(烧录完毕之后,再重新开启xavier,此时也需要连接usb线,再次进入recovery模式 ,
在虚拟机中会发现标识符已经改变,此时再安装sdk和rumtime component)
修改源 √
但是其中的粘贴内容改成下面的部分
2
3
4
5
6
7
8
9
10
11
12
13
14
deb-src https://mirrors.aliyun.com/ubuntu-ports/ focal main restricted universe multiverse
deb https://mirrors.aliyun.com/ubuntu-ports/ focal-security main restricted universe multiverse
deb-src https://mirrors.aliyun.com/ubuntu-ports/ focal-security main restricted universe multiverse
deb https://mirrors.aliyun.com/ubuntu-ports/ focal-updates main restricted universe multiverse
deb-src https://mirrors.aliyun.com/ubuntu-ports/ focal-updates main restricted universe multiverse
# deb https://mirrors.aliyun.com/ubuntu-ports/ focal-proposed main restricted universe multiverse
# deb-src https://mirrors.aliyun.com/ubuntu-ports/ focal-proposed main restricted universe multiverse
deb https://mirrors.aliyun.com/ubuntu-ports/ focal-backports main restricted universe multiverse
deb-src https://mirrors.aliyun.com/ubuntu-ports/ focal-backports main restricted universe multiverse
nomachine(可选) √
安装nomachine(同一局域网下的远程控制)
2
3
4
5
6
7
8
cat /proc/cpuinfo
# 下载好后的命令
sudo dpkg -i nomachine_7.4.1_1_arm64.deb
#下载好懒得配置,只要agx和主机都连接在同一个局域网就行
#在主机点开那个弄Machine用就点击就可以用
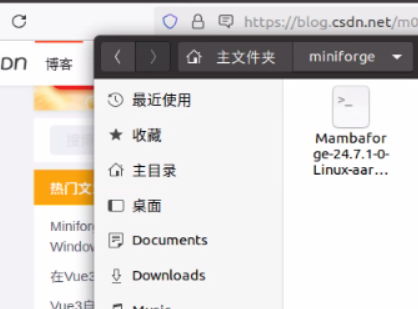
miniforge √
(我一开始是下载最新版本的 Release 24.11.0-0 Latest,但是安装到最后告诉我xxxx东西后面不在这里安装了,要自己独立安装,吓得我赶紧找到那个老版本进行下载os:真的很怕配环境有多余的麻烦,后面就下了Release 24.7.1- Latest)
2.去到那个下载目录,我自己单独给这个文件建立了新目录
在终端运行
3.一路安装 yes输入秘密
…
4.成功之后会显示如下相关文字告诉你激活环境
1 | Transaction finished |
conda虚拟环境常用命令
1 | #创建环境 |
分区与挂载
搞到这一步的时候,我买的SSD固态到了
拆开装进去SSD后,开始进行挂载
pytorch
查看cuda版本
先检查这个版本的cuda是否能支持我们所需要的yolov5(本次任务最终目标)的pytoch的环境
yolov5 依赖于 pytorch
pytorch 的版本要看当前系统的python版本和当前我们安装的cuda版本
2
3
4
5
6
7
8
9
10
11
12
13
ls /usr/bin/python*
# 查看当前系统的cuda版本
nvcc --version
# 查看当前jetpack版本
sudo apt-cache show nvidia-jetpack
# 查看当前是否cudnn的版本
ldconfig -p | grep libcudnn我的虚拟机是cuda11.4+jetpack:nvidia-jetpack5.1.4-b17+python3.8,也有python3.9+cudnn 8+ubuntu20.04
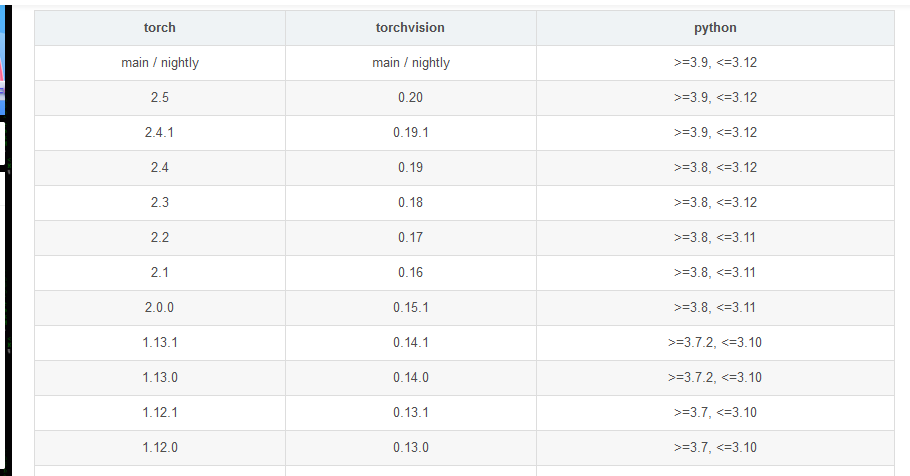
先去到https://pytorch.org/get-started/previous-versions/
看看自己的cuda版本大概能下载哪个预编译,因为我是cuda11.4,所以我下载pytorch1.12.1以及以前的版本会比较好
网址:https://forums.developer.nvidia.com/t/pytorch-for-jetson/72048
来到这个网站
看看自己的cuda版本大概能下载哪个预编译,然后在这里进行下载,上面那个就是让你看版本而已
最终要了这个
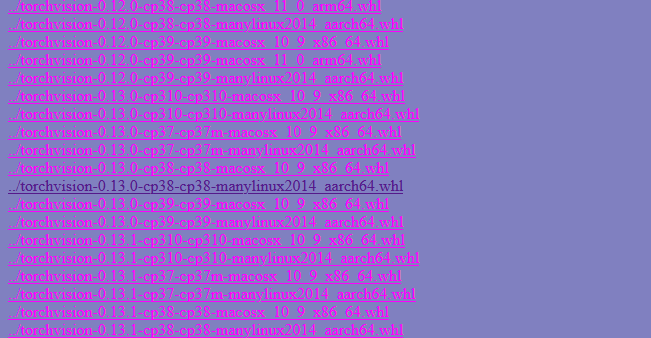
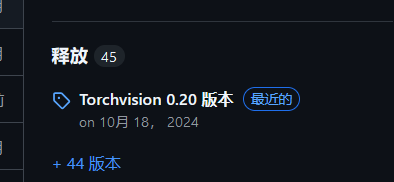
根据下面的表再去看看对应vision的版本
https://download.pytorch.org/whl/cu110/torch_stable.html
2
3
4
5
6
7
8
9
10
11
sudo apt-get install libopenblas-base libopenmpi-dev libomp-dev
pip install Cython
pip install numpy=1.21.0
# 先进入到存在torch-1.12.0a0+2c916ef.nv22.3-cp38-cp38-linux_aarch64.whl的文件夹
# 输入以下命令
pip install torch-1.12.0a0+2c916ef.nv22.3-cp38-cp38-linux_aarch64.whl
# 进入存在torchvision-0.13.0-cp38-cp38-manylinux2014_aarch64.whl的文件夹
pip intall torchvision-0.13.0-cp38-cp38-manylinux2014_aarch64.whl最后


最终检测torch是否安装成功
1 | $ python |
真的很无语
这个版本使用在arrch64上是没有办法和上面特供给nvidia的torch匹配

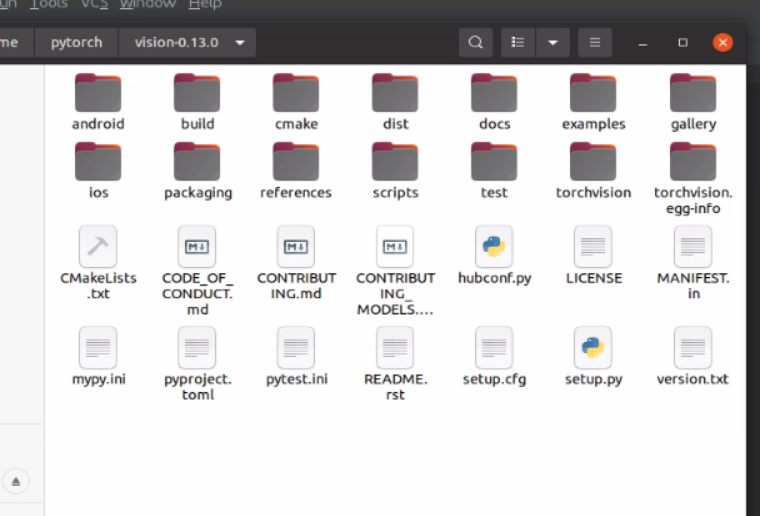
源码编译方案
去官网找源码自己编译
找到适配的版本的源码
下载其中一个
下载结束后,进入文件夹内进行安装:
2
3
4
5
export BUILD_VERSION=0.13.0 # where 0.x.0 is the torchvision version
python3 setup.py install --user
cd ../ # attempting to load torchvision from build dir will result in import error4. 验证
拷贝代码进行验证:
2
3
4
5
6
7
8
9
10
11
12
13
import torchvision
print(torch.__version__)
print('CUDA available: ' + str(torch.cuda.is_available()))
print('cuDNN version: ' + str(torch.backends.cudnn.version()))
a = torch.cuda.FloatTensor(2).zero_()
print('Tensor a = ' + str(a))
b = torch.randn(2).cuda()
print('Tensor b = ' + str(b))
c = a + b
print('Tensor c = ' + str(c))
print(torchvision.__version__)https://blog.csdn.net/qq_21843433/article/details/119255360
(方法参考)


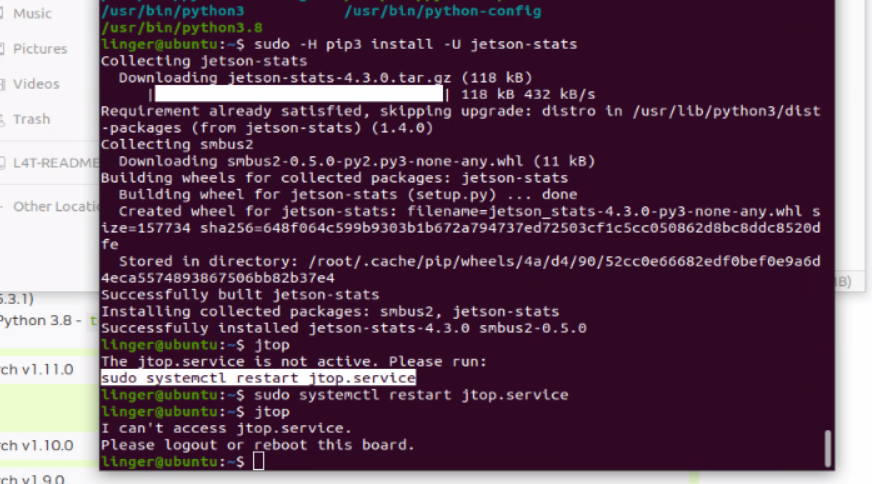
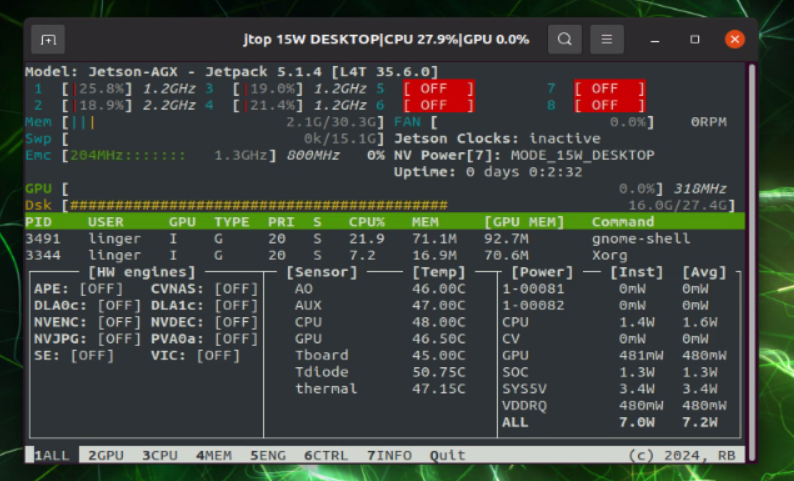
安装jtop
参考
https://blog.csdn.net/weixin_67026673/article/details/128684083
1 | sudo apt install python3-pip |
过程
安装ibus的中文输入法
(搜狗的我厌倦了)
https://blog.csdn.net/xiaopang_love_study/article/details/119487748
命令运行并且设置之后还不出现就重启一下系统就可以了
安装opencv(可选) * 尚未安装
(后面还是自己编译自己装了)
opencv-python
刷机的时候自动安装了,看这个
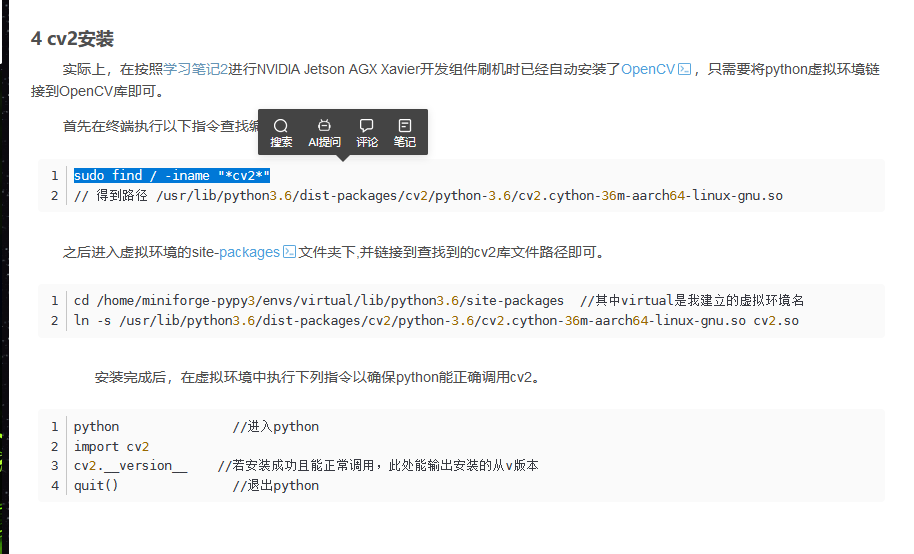
https://blog.csdn.net/Mr_111000/article/details/118254377
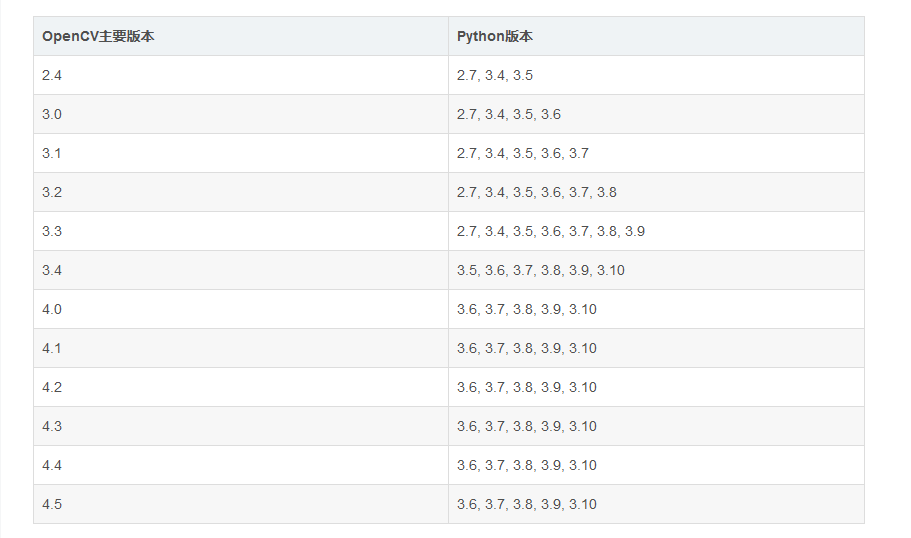
.查看opencv和python的对应关系
安装pycharm
官网: https://www.jetbrains.com.cn/en-us/pycharm/download/?section=windows
安装之前安装java环境:https://blog.csdn.net/the_beginner/article/details/118930922
https://www.freesion.com/article/8932719445/
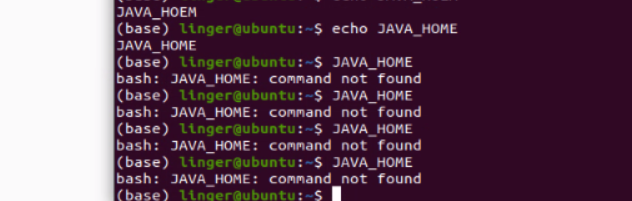
但是我后面发现这两个不太管用
会出现java_home什么找不到命令之类的,相当神经
换一个安装方案:
https://cn.linux-console.net/?p=29733(我jer和jdk都安了,不知道有没有重复的包被安装)、
安装完成之后检查一下
打开 vim ~/.bashrc
再source一下
完全还是不行
进去看了一眼好像搞错目录了
其实也不行
https://blog.csdn.net/weixin_45329799/article/details/120670117
这个就很完美
完美验证成功


pycharm创建快捷方式:https://blog.csdn.net/weixin_44312186/article/details/98443374
其他可能需要注意的事项
https://hahaha.fmy1024.cn/html_online/4340_121294956online.html
常用命令
1 | # 单独查看内存使用情况的命令 |
1 | # 查看内存及cpu使用情况的命令: |